gfs sugar cookies baking instructions

GFS sugar cookies are a classic treat known for their soft texture and sweet flavor. Perfect for holidays or gatherings‚ they can be baked in 8-14 minutes at 325°F to 375°F‚ offering a versatile canvas for creative decorating.

Overview of GFS Sugar Cookies

GFS sugar cookies are a beloved classic‚ cherished for their soft‚ chewy texture and delicate sweetness. These cookies are a versatile treat‚ perfect for holidays‚ parties‚ or everyday enjoyment. They can be baked in 8-14 minutes at temperatures ranging from 325°F to 375°F‚ depending on the desired texture. With their buttery flavor and simple decorating options‚ GFS sugar cookies are a favorite for both novice and experienced bakers. Their adaptability to various shapes and toppings makes them a delightful canvas for creativity‚ ensuring they remain a timeless favorite for any occasion.

Why GFS Sugar Cookies Are Popular

GFS sugar cookies are popular due to their buttery‚ classic taste and versatility in decoration. They are perfect for holidays‚ parties‚ and fun baking sessions. The cookies are soft and chewy when baked correctly‚ making them a favorite among both children and adults. Additionally‚ their simple decorating options‚ such as adding colored sugar or frosting‚ allow for creative personalization. This adaptability and delicious flavor make GFS sugar cookies a timeless treat that continues to be a tradition for many‚ especially during autumn‚ as inspired by recipes shared by figures like Taylor Swift. Their ease of preparation also endears them to bakers of all skill levels.

Ingredients and Equipment Needed

Ingredients: All-purpose flour‚ granulated sugar‚ unsalted butter‚ eggs‚ vanilla extract‚ baking powder‚ and salt. Optional decorations include frosting‚ colored sugar‚ or sprinkles. Equipment: Mixing bowls‚ electric mixer‚ measuring cups‚ baking sheets‚ and a cooling rack.

Essential Ingredients for GFS Sugar Cookies

The foundation of GFS sugar cookies begins with a few key ingredients. You’ll need:

  • All-purpose flour for structure and texture.
  • Granulated sugar for sweetness and tenderness.
  • Unsalted butter‚ softened‚ for a creamy base.
  • Large eggs to bind ingredients and add moisture.
  • Vanilla extract for a hint of flavor.
  • Baking powder to ensure the cookies rise slightly;
  • Salt to balance sweetness.

Optional additions include frosting‚ colored sugar‚ or sprinkles for decoration. Measurements vary‚ but a typical batch uses about 2 cups of flour‚ 1 cup of sugar‚ and 1/2 cup of butter. Ensure all ingredients are at room temperature for the best results.

Baking Equipment Requirements

To bake GFS sugar cookies‚ you’ll need a few essential tools. Start with a mixing bowl for creaming butter and sugar‚ and a whisk or electric mixer for smooth dough. A rolling pin is handy for rolling out dough to your desired thickness. Use baking sheets lined with parchment paper or a silicone mat to prevent sticking. An oven is‚ of course‚ necessary—ensure it’s accurate with an oven thermometer. A cookie cutter or the rim of a glass can shape the dough. Optional items include a food processor for crumb processing and measuring cups/spoons for precise measurements. Parchment paper or silicone mats are recommended for easy cleanup.

Preparing the Dough

Preparing the dough involves mixing‚ creaming butter and sugar‚ then combining wet and dry ingredients. Ensure smooth consistency without overmixing to avoid a tough texture. Dough is ready for portioning when pliable and even in texture.

Measuring and Mixing Dry Ingredients

Accurately measure flour‚ baking powder‚ baking soda‚ and salt. Sift ingredients to ensure even distribution and aeration. In a large bowl‚ whisk together 2 ¼ cups all-purpose flour‚ 1 teaspoon baking powder‚ ½ teaspoon baking soda‚ and ½ teaspoon salt. Sifting prevents lumps and ensures leavening agents are evenly mixed. This step is crucial for consistent texture and proper rise in the cookies. Avoid overmixing‚ as it can lead to a dense dough. Set the dry ingredients aside until ready to combine with wet ingredients for a smooth‚ even dough formation.

Combining Wet and Dry Ingredients

Gradually incorporate the wet ingredients into the dry mixture. In a separate bowl‚ cream together butter and sugar until light and fluffy. Add eggs one at a time‚ mixing well‚ then stir in vanilla extract. Slowly pour the dry ingredients into the wet mixture‚ mixing until just combined. Avoid overmixing to prevent a dense texture. Stop mixing once the dough comes together in a cohesive ball. Scrape down the sides of the bowl to ensure all ingredients are evenly incorporated. The result should be a smooth‚ pliable dough ready for resting or portioning.

Resting the Dough

Once the dough is combined‚ it’s essential to let it rest. Cover the dough with plastic wrap or a damp cloth and refrigerate for at least 30 minutes. This step allows the gluten to relax‚ making the dough easier to roll out later. Chilling also enables the butter to firm up‚ ensuring the cookies retain their shape during baking. For better flavor development‚ some bakers prefer to let the dough rest overnight. Avoid over-resting‚ as this can lead to a dense texture. Proper resting ensures the dough is manageable and ready for portioning into cookie-sized pieces.

Portioning the Dough for Cookies

After resting‚ the dough is ready to be portioned into individual cookie sizes. Use a cookie scoop or a spoon to create uniform portions‚ ensuring even baking. For consistency‚ aim for balls of dough about 1-2 tablespoons in size. Alternatively‚ roll the dough into a log and slice it into equal rounds. Place the portions on a parchment-lined tray‚ leaving space between them. Lightly press down on each piece to flatten slightly‚ if desired. Chilling the portions for 10-15 minutes before baking helps maintain their shape. Proper portioning ensures cookies bake evenly and retain their texture.

Baking Instructions

Preheat oven to 375°F (190°C). Place dough portions on a parchment-lined baking sheet‚ spacing evenly. Bake for 8-10 minutes until lightly golden. Let cool slightly before transferring to a rack to cool completely. This ensures crisp edges and chewy centers‚ achieving perfect texture and appearance for your GFS sugar cookies.

Preheating the Oven

Preheating the oven is a critical step in baking GFS sugar cookies. Set your oven to 375°F (190°C) and allow it to preheat for about 10-15 minutes. Ensure the oven has reached the correct temperature using an oven thermometer for accuracy. Proper preheating guarantees even baking and helps achieve the perfect texture. Avoid opening the oven door during preheating to maintain consistent heat. Once preheated‚ your oven is ready for baking‚ ensuring your GFS sugar cookies turn out light‚ soft‚ and evenly cooked every time.

Arranging Cookies on the Baking Sheet

Properly arranging GFS sugar cookies on the baking sheet is essential for even baking. Line the sheet with parchment paper or a silicone mat for easy cleanup and to prevent sticking. Place dough balls about 2 inches apart to allow for spreading. Avoid overcrowding‚ as this can cause cookies to merge. Gently flatten the dough balls slightly with your fingers or a fork‚ if desired‚ to ensure even cooking. For uniform results‚ bake in a single layer and avoid stacking dough portions. This setup ensures cookies bake evenly and retain their shape. Chilling the dough briefly can also help maintain their form during baking.

Baking Time and Temperature Guidelines

Bake GFS sugar cookies in a preheated oven at 375°F (190°C) for 8-12 minutes‚ depending on cookie size and thickness. Thicker cookies may require up to 14 minutes‚ while thinner ones bake faster. Check for doneness when edges are lightly golden. Avoid overbaking‚ as this can lead to dryness. Rotate the baking sheet halfway through for even cooking. Use a timer and monitor the cookies closely during the last few minutes. Let them cool slightly on the sheet before transferring to a rack. Proper temperature and timing ensure soft‚ chewy centers and crisp edges.

Monitoring the Baking Process

Monitor the cookies closely during baking to ensure they don’t overcook. Check for lightly golden edges and a set center. For accurate monitoring‚ use oven light to observe without opening the door excessively. Rotate the baking sheet halfway through the baking time for even cooking. Avoid overbaking‚ as cookies continue to firm up after cooling. If using a timer‚ stay nearby to check the cookies 1-2 minutes before the timer goes off. Proper monitoring ensures soft‚ chewy centers and prevents dryness. Remove from the oven when edges are golden but centers still appear slightly soft.

Cooling and Handling Cookies

Let cookies cool on the baking sheet for 5 minutes before transferring to a cooling rack. Handle gently to avoid breaking. Use a spatula for support.

Cooling Cookies on the Baking Sheet

After baking‚ allow cookies to cool on the baking sheet for 5-7 minutes. This step is crucial as it helps cookies set and prevents them from breaking. Use a spatula to gently lift and inspect cookies for doneness. If edges are lightly golden and centers appear set‚ they are ready to transfer. Avoid overcooling‚ as cookies may become difficult to remove. Proper cooling ensures cookies retain their shape and texture‚ making them easier to handle and store. Always cool cookies on a wire rack after removing them from the baking sheet for optimal freshness and structure.

Transferring Cookies to a Cooling Rack

Once cookies have cooled on the baking sheet for 5-7 minutes‚ use a spatula to carefully transfer them to a wire cooling rack. Gently slide the spatula under each cookie to avoid breaking. Place cookies in a single layer on the rack to ensure even cooling. This step prevents cookies from becoming soggy and promotes air circulation‚ helping them retain their shape and texture. Avoid overcrowding the rack‚ as this can cause cookies to stick together. Proper transfer ensures cookies cool completely and remain fresh for decoration or storage. Always handle cookies gently to maintain their integrity.

Decorating Your Sugar Cookies

Decorating is a fun‚ creative step where you can personalize your cookies with frosting‚ icings‚ or embellishments like sprinkles‚ making them visually appealing and flavorful.

Preparing Frosting or Icing

To prepare frosting or icing for GFS sugar cookies‚ combine powdered sugar‚ butter or cream cheese‚ and milk or vanilla extract in a bowl. Mix until smooth and creamy. Add food coloring for desired hues. For a thinner consistency‚ add more milk; for thicker‚ add powdered sugar. Common types include powdered sugar icing‚ buttercream‚ or cream cheese frosting. Ensure the frosting is room temperature for even spreading. Flavor variations like almond extract or citrus zest can enhance taste. Properly prepared frosting is essential for decorating‚ offering both visual appeal and extra flavor to your cookies.

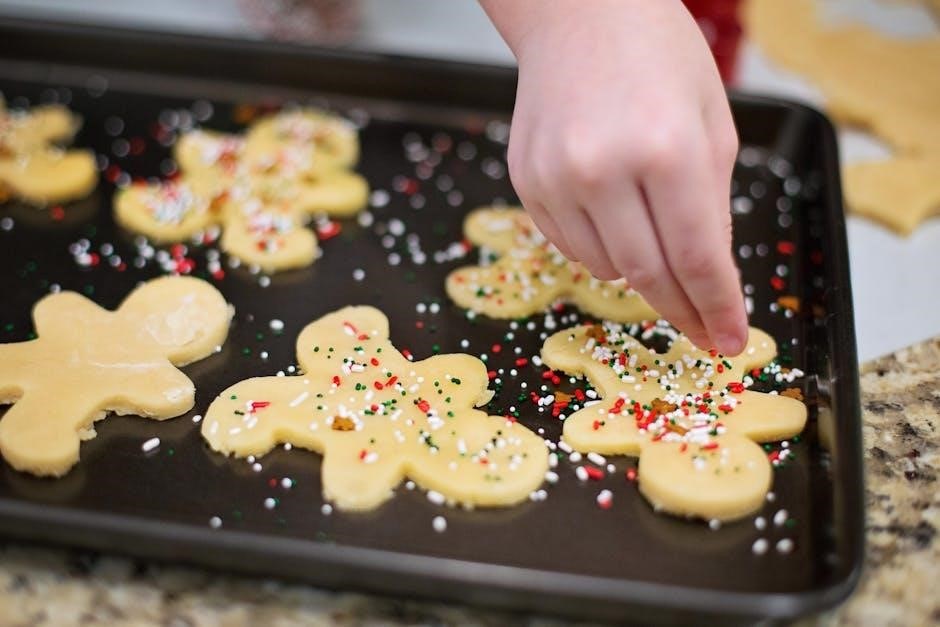
Decorating Techniques for Sugar Cookies

Decorating GFS sugar cookies involves creativity and precision. Start with piping using royal icing‚ creating borders and details. Flooding‚ or filling large areas with thin icing‚ is next. Use stencils for intricate designs or freehand with piping bags. Add sprinkles‚ edible glitter‚ or small candies before icing hardens. Layering colors or techniques enhances visual appeal. For intricate designs‚ try parchment transfers or stamping. Experiment with textures‚ like drizzling with chocolate or adding shredded coconut. Properly prepared frosting and tools are key for professional-looking results. Practice makes perfect in achieving beautiful‚ unique designs for your GFS sugar cookies.

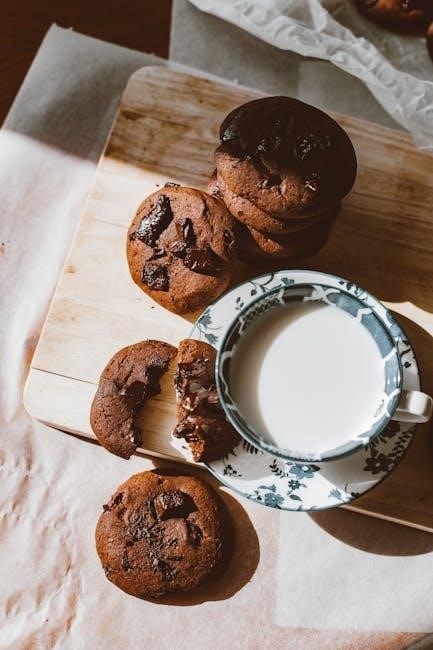
Storage and Freshness

Store baked GFS sugar cookies in an airtight container at room temperature for up to 5 days. For longer freshness‚ freeze cookies in a single layer in an airtight container or freezer bag for up to 2 months. Thaw frozen cookies at room temperature or refrigerate overnight. To maintain texture‚ avoid moisture exposure and keep cookies away from strong-smelling foods‚ as they can absorb odors. Proper storage ensures cookies remain soft and flavorful‚ while freezing preserves freshness without compromising quality or taste.

Storing Baked Sugar Cookies

To maintain the freshness of GFS sugar cookies‚ store them in an airtight container at room temperature for up to 5 days. Layer cookies with parchment paper to prevent sticking. Keep the container away from direct sunlight and moisture to preserve texture. For decorated cookies‚ store them separately to avoid smudging the frosting. If cookies are undecorated‚ they can also be stored in a single layer in a zip-top bag. To extend freshness‚ refrigerate for up to 7 days‚ though texture may soften slightly. Always ensure the container is sealed tightly to prevent air exposure and odor absorption from nearby foods.

Freezing Cookies for Later Use

GFS sugar cookies can be frozen to preserve freshness for up to 3 months. Allow baked cookies to cool completely before freezing to prevent moisture buildup. Place cookies in a single layer in an airtight container or freezer-safe bag‚ separating layers with parchment paper to avoid sticking. For decorated cookies‚ freeze them uncovered until firm‚ then transfer to a container or bag. Frozen cookies can be thawed at room temperature when needed. This method ensures cookies retain their texture and flavor‚ making it ideal for preparing ahead of special occasions or events.

Tips for Perfect Sugar Cookies

  • Use room-temperature ingredients for better dough consistency.
  • Avoid overmixing to prevent tough cookies.
  • Chill dough to enhance flavor and texture.
  • Ensure oven temperature accuracy for even baking.

Ensuring Soft and Chewy Texture

To achieve soft and chewy GFS sugar cookies‚ use a combination of white and brown sugar for moisture retention. Avoid overbaking—cookies should be lightly golden and still soft when removed from the oven. Let them cool on the baking sheet for 5 minutes before transferring to a rack. Using room-temperature butter and not overmixing the dough also helps maintain a tender texture. For an extra chewy center‚ bake until edges are set but centers appear slightly underbaked. Proper hydration and precise baking times are key to achieving the perfect softness.

Avoiding Common Baking Mistakes

To ensure perfect GFS sugar cookies‚ avoid overmixing the dough‚ as it can lead to tough cookies. Use room-temperature ingredients for proper emulsification and a tender texture. Accurate measurements are crucial—use a scale if possible. Overbaking is a common error; cookies should be lightly golden. Avoid opening the oven too early‚ as this can cause cookies to sink. Chilling the dough prevents excessive spreading and ensures even baking. By addressing these issues‚ you’ll achieve consistent‚ delicious results. Proper technique and attention to detail are key to avoiding common pitfalls.

Troubleshooting

Common issues with GFS sugar cookies include overbaking‚ which leads to hardness‚ and underbaking‚ resulting in softness. Excessive spread can be resolved by chilling the dough properly.

Solving Issues with Cookie Spread

Cookie spread can occur due to overheating or improper dough handling. Ensure dough is chilled adequately before baking to maintain shape. Using parchment-lined sheets prevents sticking. If cookies still spread excessively‚ check oven temperature accuracy. Overmixing dough can also cause spread‚ so mix wet and dry ingredients just until combined. Avoid overbuttering‚ as excess fat melts during baking. For best results‚ portion dough evenly and space cookies appropriately on the sheet. Chilling dough balls before baking helps retain shape. These steps minimize spread‚ yielding perfectly formed GFS sugar cookies every time.

Addressing Overbaking or Underbaking

Overbaking or underbaking can affect the texture and appearance of GFS sugar cookies. To avoid overbaking‚ monitor cookies closely during the final minutes of baking. Look for edges lightly browning; this indicates doneness. Underbaked cookies may appear pale and soft. If underbaked‚ bake for an additional minute and check again. For overbaked cookies‚ reduce oven temperature by 5°F or shorten baking time. Ensure accurate oven temperature using an oven thermometer. Properly baked cookies should be firm around the edges and soft in the center. Adjust timing as needed for consistent results.

Baking GFS sugar cookies is a rewarding process that combines precision and creativity. By following instructions and using quality ingredients‚ you’ll achieve delicious‚ visually appealing results.

Final Thoughts on Baking GFS Sugar Cookies

Baking GFS sugar cookies is a delightful experience that combines simplicity with creativity. With precise measurements and proper techniques‚ you’ll create soft‚ chewy‚ and visually appealing treats. Decorating adds a personal touch‚ making them perfect for celebrations or everyday enjoyment. Experiment with flavors and frostings to elevate your cookies. Remember‚ consistency in ingredients and baking times ensures the best results. Share your creations with joy‚ knowing the effort and love behind each cookie. Happy baking!

Additional Resources

Explore more baking inspiration and guides on platforms like Allrecipes‚ King Arthur Baking‚ or YouTube for GFS sugar cookies. These resources offer tips‚ recipes‚ and troubleshooting advice.

Recommended Recipes and Guides

For perfect GFS sugar cookies‚ explore trusted recipes from renowned baking experts. Check out Sally’s Baking Addiction for classic sugar cookie recipes and troubleshooting tips. The King Arthur Flour Cookie Companion offers detailed guides for achieving soft‚ chewy centers and crisp edges. YouTube channels like Binging with Babish provide step-by-step video tutorials for decorating and baking. Additionally‚ Pinterest has a wealth of inspiration for creative cookie designs and flavor variations. These resources ensure you master the art of baking and decorating GFS sugar cookies like a pro.

pdms 2 scoring manual pdf

The PDMS-2 Scoring Manual provides standardized procedures for administering‚ observing‚ and scoring motor skills tasks. It serves as a detailed guide for accurate assessment and intervention planning.

Overview of the PDMS-2

The Peabody Developmental Motor Scales‚ Second Edition (PDMS-2)‚ is a comprehensive assessment tool designed to evaluate the motor skills of children from birth to 6 years. It consists of six subtests: Reflexes‚ Stationary‚ Locomotion‚ Object Manipulation‚ Grasping‚ and Visual-Motor Integration. These subtests measure both gross and fine motor abilities‚ providing a detailed understanding of a child’s motor development. The PDMS-2 is widely used by occupational therapists‚ physical educators‚ and other professionals to identify developmental delays‚ strengths‚ and weaknesses. It serves as a valuable resource for planning interventions and monitoring progress. Professionals are encouraged to use the latest version of the manual to ensure accurate scoring and interpretation of results.

Purpose of the Scoring Manual

The primary purpose of the PDMS-2 Scoring Manual is to provide clear‚ standardized guidelines for accurately scoring and interpreting test results. It ensures consistency and reliability in assessing motor skills‚ enabling professionals to identify developmental delays and plan appropriate interventions. The manual offers detailed instructions on recording scores for each subtest‚ calculating developmental quotients‚ and understanding the Total Motor Quotient (TMQ). It also emphasizes the importance of using the latest version to incorporate updated scoring procedures and criteria. By following the manual’s guidelines‚ clinicians can ensure accurate and reliable assessments‚ which are essential for making informed decisions about a child’s motor development and support.

Structure of the PDMS-2 Scoring Manual

The PDMS-2 Scoring Manual is structured to ensure clarity and ease of use for professionals assessing motor skills. It begins with an overview of the assessment tool‚ followed by detailed procedures for administering and scoring each subtest. The manual includes sections on recording scores‚ calculating developmental quotients‚ and interpreting results. Appendices provide additional resources‚ such as scoring forms and normative data‚ to support accurate assessment. The manual is designed to be user-friendly‚ with clear instructions and examples to guide clinicians through the scoring process. Regular updates ensure that the manual reflects the latest research and best practices in motor skills assessment‚ making it an essential resource for professionals working with children.

The Six Subtests of the PDMS-2

The PDMS-2 includes six subtests: Reflexes‚ Stationary‚ Locomotion‚ Object Manipulation‚ Grasping‚ and Visual-Motor Integration‚ each assessing different aspects of motor skills in children.

Reflexes Subtest

The Reflexes Subtest evaluates the presence and integration of primitive and postural reflexes in children‚ which are foundational for motor development. It assesses reflexes such as the rooting‚ sucking‚ and tonic labyrinthine reflexes‚ which are critical for early motor control. This subtest is particularly relevant for younger children‚ typically administered to those aged 0 to 12 months. The scoring process involves observing and recording the presence or absence of specific reflexes‚ with higher scores indicating better integration of these reflexes. The Reflexes Subtest helps identify delays or retained primitive reflexes that may interfere with gross and fine motor skills. Accurate scoring requires careful observation and knowledge of typical developmental timelines‚ making it a valuable tool for early detection of motor challenges. Proper administration ensures reliable results for clinical decision-making.

Stationary Subtest

The Stationary Subtest assesses a child’s ability to maintain balance and control in stationary positions‚ such as sitting or standing. It evaluates the quality of posture‚ stability‚ and the ability to make voluntary movements without losing balance. This subtest is appropriate for children aged 0 to 72 months. Items include behaviors like maintaining a sitting position without support‚ standing on one foot‚ or balancing with eyes closed. Scoring is based on the child’s ability to perform each task successfully. The Stationary Subtest provides insights into a child’s postural control‚ which is essential for higher-level motor skills. Accurate scoring requires careful observation of the child’s movements and posture. This subtest is crucial for identifying balance difficulties or delays in postural development. It is a key component of the PDMS-2 motor assessment. Proper administration ensures valid and reliable results.

Locomotion Subtest

The Locomotion Subtest evaluates a child’s ability to move from one place to another‚ such as crawling‚ walking‚ or running. It assesses the quality and coordination of locomotor skills‚ including balance‚ rhythm‚ and the ability to transition between movements. This subtest is designed for children aged 0 to 72 months and includes tasks like creeping‚ walking forward/backward‚ and hopping. Scoring focuses on the child’s mastery of each locomotor milestone and the fluidity of their movements. The Locomotion Subtest is essential for understanding a child’s ability to move independently and engage in physical activities. It provides insights into gross motor development and helps identify delays or difficulties in locomotor skills. Accurate scoring requires careful observation of the child’s movement patterns and adherence to standardized criteria. This subtest is a critical component of the PDMS-2 assessment.

Object Manipulation Subtest

The Object Manipulation Subtest assesses fine motor skills‚ focusing on how children use their hands and fingers to manipulate objects. It evaluates the ability to perform tasks like picking up small items‚ transferring objects between hands‚ and using tools or utensils. The subtest is divided into two parts: one for younger children (0–36 months) and one for older children (37–72 months). Scoring is based on the child’s precision‚ dexterity‚ and coordination in completing tasks. This subtest helps identify delays or difficulties in fine motor development and provides insights into hand function and finger dexterity. Accurate scoring requires careful observation of the child’s ability to perform each task according to standardized criteria. The Object Manipulation Subtest is a key component of the PDMS-2 for assessing fine motor skills. It is essential for understanding a child’s ability to interact with objects and perform daily tasks. The subtest also helps in planning interventions to improve fine motor abilities. By evaluating how children manipulate objects‚ it offers a comprehensive view of their fine motor development. This subtest is crucial for identifying strengths and areas needing support in motor skills. The PDMS-2 scoring manual provides detailed guidelines to ensure consistent and accurate assessment. The Object Manipulation Subtest is a valuable tool for clinicians and educators to monitor progress and plan appropriate interventions. It plays a significant role in the overall assessment of a child’s motor abilities. The subtest’s focus on object manipulation makes it essential for understanding a child’s fine motor development. The scoring manual ensures that each task is evaluated consistently‚ providing reliable results. The Object Manipulation Subtest is a critical part of the PDMS-2‚ offering insights into a child’s fine motor skills and their ability to engage in activities requiring hand-eye coordination and dexterity. It is designed to assess a range of skills‚ from simple grasping to complex manipulations‚ making it a comprehensive tool for motor assessment. The subtest’s structure allows for a detailed evaluation of fine motor development‚ which is vital for identifying delays and planning interventions. The PDMS-2 scoring manual provides clear instructions for administering and scoring this subtest‚ ensuring accuracy and reliability. The Object Manipulation Subtest is an essential component of the PDMS-2‚ offering valuable information about a child’s fine motor abilities. It helps professionals understand how children interact with objects and perform tasks requiring hand function. The subtest’s focus on manipulation skills makes it a key tool for assessing fine motor development. The PDMS-2 scoring manual ensures that each task is scored consistently‚ providing a reliable measure of a child’s abilities. The Object Manipulation Subtest is a critical part of the PDMS-2 assessment‚ offering insights into a child’s fine motor skills and their ability to perform daily tasks. It is designed to assess a range of skills‚ from simple grasping to complex manipulations‚ making it a comprehensive tool for motor assessment. The subtest’s structure allows for a detailed evaluation of fine motor development‚ which is vital for identifying delays and planning interventions. The PDMS-2 scoring manual provides clear instructions for administering and scoring this subtest‚ ensuring accuracy and reliability. The Object Manipulation Subtest is an essential component of the PDMS-2‚ offering valuable information about a child’s fine motor abilities. It helps professionals understand how children interact with objects and perform tasks requiring hand function. The subtest’s focus on manipulation skills makes it a key tool for assessing fine motor development. The PDMS-2 scoring manual ensures that each task is scored consistently‚ providing a reliable measure of a child’s abilities. The Object Manipulation Subtest is a critical part of the PDMS-2 assessment‚ offering insights into a child’s fine motor skills and their ability to perform daily tasks. It is designed to assess a range of skills‚ from simple grasping to complex manipulations‚ making it a comprehensive tool for motor assessment. The subtest’s structure allows for a detailed evaluation of fine motor development‚ which is vital for identifying delays and planning interventions. The PDMS-2 scoring manual provides clear instructions for administering and scoring this subtest‚ ensuring accuracy and reliability. The Object Manipulation Subtest is an essential component of the PDMS-2‚ offering valuable information about a child’s fine motor abilities. It helps professionals understand how children interact with objects and perform tasks requiring hand function. The subtest’s focus on manipulation skills makes it a key tool for assessing fine motor development. The PDMS-2 scoring manual ensures that each task is scored consistently‚ providing a reliable measure of a child’s abilities. The Object Manipulation Subtest is a critical part of the PDMS-2 assessment‚ offering insights into a child’s fine motor skills and their ability to perform daily tasks. It is designed to assess a range

Grasping Subtest

The Grasping Subtest evaluates a child’s ability to use their hands to grasp and release objects‚ assessing foundational fine motor skills. It is divided into two age ranges: 0–36 months and 37–72 months. The subtest uses various objects‚ such as small toys or blocks‚ to observe how the child picks up‚ holds‚ and lets go of items. Scoring focuses on the child’s ability to perform tasks with precision and control. This subtest helps identify difficulties in hand function and finger strength‚ which are essential for daily activities. Accurate scoring requires careful observation of grasp patterns and release techniques. The Grasping Subtest provides insights into early motor development and hand-eye coordination. It is a fundamental component of the PDMS-2 for assessing fine motor abilities and planning interventions to address delays. The subtest’s structure ensures a comprehensive evaluation of grasping skills‚ making it a valuable tool for clinicians and educators. By focusing on grasping and releasing‚ it offers a clear understanding of a child’s fine motor foundation. The PDMS-2 scoring manual provides detailed criteria to ensure consistent and reliable assessment. The Grasping Subtest is a critical part of the PDMS-2‚ offering essential information about a child’s ability to interact with objects. It helps professionals identify strengths and areas needing support in fine motor development. The subtest’s focus on grasping skills makes it a key tool for assessing early motor abilities. The PDMS-2 scoring manual ensures that each task is scored consistently‚ providing a reliable measure of a child’s abilities. The Grasping Subtest is a vital component of the PDMS-2 assessment‚ offering insights into a child’s fine motor skills and their ability to perform basic tasks. It is designed to assess a range of skills‚ from simple grasping to more complex releases‚ making it a comprehensive tool for motor assessment. The subtest’s structure allows for a detailed evaluation of fine motor development‚ which is vital for identifying delays and planning interventions. The PDMS-2 scoring manual provides clear instructions for administering and scoring this subtest‚ ensuring accuracy and reliability. The Grasping Subtest is an essential part of the PDMS-2‚ offering valuable information about a child’s fine motor abilities. It helps professionals understand how children interact with objects and perform tasks requiring hand function. The subtest’s focus on grasping skills makes it a key tool for assessing fine motor development. The PDMS-2 scoring manual ensures that each task is scored consistently‚ providing a reliable measure of a child’s abilities. The Grasping Subtest is a critical part of the PDMS-2 assessment‚ offering insights into a child’s fine motor skills and their ability to perform daily tasks. It is designed to assess a range of skills‚ from simple grasping to more complex releases‚ making it a comprehensive tool for motor assessment. The subtest’s structure allows for a detailed evaluation of fine motor development‚ which is vital for identifying delays and planning interventions. The PDMS-2 scoring manual provides clear instructions for administering and scoring this subtest‚ ensuring accuracy and reliability. The Grasping Subtest is an essential part of the PDMS-2‚ offering valuable information about a child’s fine motor abilities. It helps professionals understand how children interact with objects and perform tasks requiring hand function. The subtest’s focus on grasping skills makes it a key tool for assessing fine motor development. The PDMS-2 scoring manual ensures that each task is scored consistently‚ providing a reliable measure of a child’s abilities. The Grasping Subtest is a critical part of the PDMS-2 assessment‚ offering insights into a child’s fine motor skills and their ability to perform daily tasks. It is designed to assess a range of skills‚ from simple grasping to more complex releases‚ making it a comprehensive tool for motor assessment. The subtest’s structure allows for a detailed evaluation of fine motor development‚ which is vital for identifying delays and planning interventions. The PDMS-2 scoring manual provides clear instructions for administering and scoring this subtest‚ ensuring accuracy and reliability. The Grasping Subtest is an essential part of the PDMS-2‚ offering valuable information about a child’s fine motor abilities. It helps professionals understand how children interact with objects and perform tasks requiring hand function. The subtest’s focus on grasping skills makes it a key tool for assessing fine motor development. The PDMS-2 scoring manual ensures that each task is scored consistently‚ providing a reliable measure of a child’s abilities. The Grasping Subtest is a critical part of the PDMS-2 assessment‚ offering insights into a child’s fine motor skills and their ability to perform daily tasks. It is designed to assess a range of skills‚ from simple grasping to more complex releases‚ making it a comprehensive tool for motor assessment. The subtest’s structure allows for a detailed evaluation of fine motor development‚ which is vital for identifying delays and planning interventions. The PDMS-2 scoring manual provides clear instructions for administering and scoring this subtest‚ ensuring accuracy and reliability. The Grasping Subtest is an essential part of the PDMS-2‚ offering valuable information about a child’s fine motor abilities. It helps professionals understand how children interact with objects and perform tasks requiring hand function. The subtest’s focus on grasping skills makes it a key tool for assessing fine motor development. The PDMS-2 scoring manual ensures that each task is scored consistently‚ providing a reliable measure of a child’s abilities. The Grasping Subtest is a critical part of the PDMS-2 assessment‚ offering insights into a child’s fine motor skills and their ability to perform daily tasks. It is designed to assess a range of skills‚ from simple grasping to more complex releases‚ making it a comprehensive tool for motor assessment. The subtest’s structure allows for a detailed evaluation of fine motor development‚ which is vital for identifying delays and planning interventions. The PDMS-2 scoring manual provides clear instructions for administering and scoring this subtest‚ ensuring accuracy and reliability. The Grasping Subtest is an essential part of the PDMS-2‚ offering valuable information about a child’s fine motor abilities. It helps professionals understand how children interact with objects and perform tasks requiring hand function. The subtest’s focus on grasping skills makes it a key tool for assessing fine motor development. The PDMS-2 scoring manual ensures that each task is scored consistently‚ providing a reliable measure of a child’s abilities. The Grasping Subtest is a critical part of the PDMS-2 assessment‚ offering insights into a child’s fine motor skills and their ability to perform daily tasks. It is designed to assess a range of skills‚ from simple grasping to more complex releases‚ making it a comprehensive tool for motor assessment. The subtest’s structure allows for a detailed evaluation of fine motor development‚ which is vital for identifying delays and planning interventions. The PDMS-2 scoring manual provides clear instructions for administering and scoring this subtest‚ ensuring accuracy and reliability. The Grasping Subtest is an essential part of the PDMS-2‚ offering valuable information about a child’s fine motor abilities. It helps professionals understand how children interact with objects and perform tasks requiring hand function. The subtest’s focus on grasping skills makes it a key tool for assessing fine motor development. The PDMS-2 scoring manual ensures that each task is scored consistently‚ providing a reliable measure of a child’s abilities. The Grasping Subtest is a critical part of the PDMS-2 assessment‚ offering insights into a child’s fine motor skills and their ability to perform daily tasks. It is designed to assess a range of skills‚ from simple grasping to more complex releases‚ making it a comprehensive tool for motor assessment. The subtest’s structure allows for a detailed evaluation of fine motor development‚ which is vital for identifying delays and planning interventions. The PDMS-2 scoring manual provides clear instructions for administering and scoring this subtest‚ ensuring accuracy and reliability. The Grasping Subtest is an essential part of the PDMS-2‚ offering valuable information about a child’s fine motor abilities. It helps professionals understand how children interact with objects and perform tasks requiring hand function. The subtest’s focus on grasping skills makes it a key tool for assessing fine motor development. The PDMS-2 scoring manual ensures that each task is scored consistently‚ providing a reliable measure of a child’s abilities. The Grasping Subtest is a critical part of the PDMS-2 assessment‚ offering insights into a child’s fine motor skills and their ability to perform daily tasks.

Visual-Motor Integration Subtest

The Visual-Motor Integration Subtest assesses a child’s ability to integrate visual information with motor skills‚ essential for tasks like drawing and writing. It involves copying shapes and designs‚ ranging from simple to complex‚ to evaluate how well a child can reproduce visual stimuli accurately. The subtest is divided into two age ranges: 0–36 months and 37–72 months. Scoring focuses on the accuracy and quality of the child’s reproductions. This subtest helps identify difficulties in coordinating visual perception with motor responses‚ which are critical for academic and daily activities. The PDMS-2 scoring manual provides detailed criteria to assess the child’s performance. The Visual-Motor Integration Subtest is a valuable tool for understanding a child’s ability to integrate visual and motor skills‚ offering insights into their developmental progress. It is a key component of the PDMS-2 for assessing motor and visual-motor abilities. The subtest’s structure ensures a comprehensive evaluation of visual-motor integration skills‚ making it essential for identifying potential delays and planning interventions. The PDMS-2 scoring manual ensures consistent and reliable assessment of this critical skill area. The Visual-Motor Integration Subtest is a fundamental part of the PDMS-2‚ providing essential information about a child’s ability to combine visual and motor abilities. It helps professionals understand how children process and reproduce visual information‚ which is vital for learning and development. The subtest’s focus on integration skills makes it a key tool for assessing visual-motor development. The PDMS-2 scoring manual provides clear guidelines for administering and scoring this subtest‚ ensuring accuracy and reliability. The Visual-Motor Integration Subtest is a critical part of the PDMS-2 assessment‚ offering insights into a child’s ability to integrate visual and motor skills. It is designed to assess a range of skills‚ from basic shape copying to more complex designs‚ making it a comprehensive tool for motor and visual assessment. The subtest’s structure allows for a detailed evaluation of visual-motor integration‚ which is vital for identifying delays and planning interventions. The PDMS-2 scoring manual provides clear instructions for administering and scoring this subtest‚ ensuring accuracy and reliability. The Visual-Motor Integration Subtest is an essential part of the PDMS-2‚ offering valuable information about a child’s visual-motor abilities. It helps professionals understand how children integrate visual information with motor skills‚ which is crucial for tasks like writing and drawing. The subtest’s focus on integration skills makes it a key tool for assessing visual-motor development. The PDMS-2 scoring manual ensures that each task is scored consistently‚ providing a reliable measure of a child’s abilities. The Visual-Motor Integration Subtest is a critical part of the PDMS-2 assessment‚ offering insights into a child’s ability to integrate visual and motor skills. It is designed to assess a range of skills‚ from basic shape copying to more complex designs‚ making it a comprehensive tool for motor and visual assessment. The subtest’s structure allows for a detailed evaluation of visual-motor integration‚ which is vital for identifying delays and planning interventions. The PDMS-2 scoring manual provides clear instructions for administering and scoring this subtest‚ ensuring accuracy and reliability. The Visual-Motor Integration Subtest is an essential part of the PDMS-2‚ offering valuable information about a child’s visual-motor abilities. It helps professionals understand how children integrate visual information with motor skills‚ which is crucial for tasks like writing and drawing. The subtest’s focus on integration skills makes it a key tool for assessing visual-motor development. The PDMS-2 scoring manual ensures that each task is scored consistently‚ providing a reliable measure of a child’s abilities. The Visual-Motor Integration Subtest is a critical part of the PDMS-2 assessment‚ offering insights into a child’s ability to integrate visual and motor skills. It is designed to assess a range of skills‚ from basic shape copying to more complex designs‚ making it a comprehensive tool for motor and visual assessment. The subtest’s structure allows for a detailed evaluation of visual-motor integration‚ which is vital for identifying delays and planning interventions. The PDMS-2 scoring manual provides clear instructions for administering and scoring this subtest‚ ensuring accuracy and reliability. The Visual-Motor Integration Subtest is an essential part of the PDMS-2‚ offering valuable information about a child’s visual-motor abilities. It helps professionals understand how children integrate visual information with motor skills‚ which is crucial for tasks like writing and drawing. The subtest’s focus on integration skills makes it a key tool for assessing visual-motor development. The PDMS-2 scoring manual ensures that each task is scored consistently‚ providing a reliable measure of a child’s abilities. The Visual-Motor Integration Subtest is a critical part of the PDMS-2 assessment‚ offering insights into a child’s ability to integrate visual and motor skills. It is designed to assess a range of skills‚ from basic shape copying to more complex designs‚ making it a comprehensive tool for motor and visual assessment. The subtest’s structure allows for a detailed evaluation of visual-motor integration‚ which is vital for identifying delays and planning interventions. The PDMS-2 scoring manual provides clear instructions for administering and scoring this subtest‚ ensuring accuracy and reliability. The Visual-Motor Integration Subtest is an essential part of the PDMS-2‚ offering valuable information about a child’s visual-motor abilities. It helps professionals understand how children integrate visual information with motor skills‚ which is crucial for tasks like writing and drawing. The subtest’s focus on integration skills makes it a key tool for assessing visual-motor development. The PDMS-2 scoring manual ensures that each task is scored consistently‚ providing a reliable measure of a child’s abilities. The Visual-Motor Integration Subtest is a critical part of the PDMS-2 assessment‚ offering insights into a child’s ability to integrate visual and motor skills. It is designed to assess a range of skills‚ from basic shape copying to more complex designs‚ making it a comprehensive tool for motor and visual assessment. The subtest’s structure allows for a detailed evaluation of visual-motor integration‚ which is vital for identifying delays and planning interventions. The PDMS-2 scoring manual provides clear instructions for administering and scoring this subtest‚ ensuring accuracy and reliability. The Visual-Motor Integration Subtest is an essential part of the PDMS-2‚ offering valuable information about a child’s visual-motor abilities. It helps professionals understand how children integrate visual information with motor skills‚ which is crucial for tasks like writing and drawing. The subtest’s focus on integration skills makes it a key tool for assessing visual-motor development. The PDMS-2 scoring manual ensures that each task is scored consistently‚ providing a reliable measure of a child’s abilities. The Visual-Motor Integration Subtest is a critical part of the PDMS-2 assessment‚ offering insights into a child’s ability to integrate visual and motor skills. It is designed to assess a range of skills‚ from basic shape copying to more complex designs‚ making it a comprehensive tool for motor and visual assessment. The subtest’s structure allows for a detailed evaluation of visual-motor integration‚ which is vital for identifying delays and planning interventions. The PDMS-2 scoring manual provides clear instructions for administering and scoring this subtest‚ ensuring accuracy and reliability. The Visual-Motor Integration Subtest is an essential part of the PDMS-2‚ offering valuable information about a child’s visual-motor abilities. It helps professionals understand how children integrate visual information with motor skills‚ which is crucial for tasks like writing and drawing. The subtest’s focus on integration skills makes it a key tool for assessing visual-motor development. The PDMS-2 scoring manual ensures that each task is scored consistently‚ providing a reliable measure of a child’s abilities. The Visual-Motor Integration Subtest is a critical part of the PDMS-2 assessment‚ offering insights into a child’s ability to integrate visual and motor skills; It is designed to assess a range

Understanding the Total Motor Quotient (TMQ)

The Total Motor Quotient (TMQ) is a composite score derived from the six subtests‚ combining gross and fine motor skills. It is a standard score with a mean of 100 and a standard deviation of 15‚ providing a comprehensive measure of motor abilities.

Definition of TMQ

The Total Motor Quotient (TMQ) is a standardized composite score derived from the six subtests of the PDMS-2‚ reflecting an individual’s overall motor development. It combines measures of gross and fine motor skills into a single score‚ providing a comprehensive assessment of motor abilities. The TMQ is calculated with a mean of 100 and a standard deviation of 15‚ allowing for easy interpretation of motor proficiency relative to peers. This quotient represents the integration of reflexes‚ stationary and locomotion abilities‚ object manipulation‚ grasping‚ and visual-motor integration. It serves as a key indicator of motor competence and is essential for identifying developmental strengths and challenges in clinical and educational settings.

Calculation of TMQ

The Total Motor Quotient (TMQ) is calculated by summing the standardized scores from the six PDMS-2 subtests: Reflexes‚ Stationary‚ Locomotion‚ Object Manipulation‚ Grasping‚ and Visual-Motor Integration. Each subtest score is standardized with a mean of 10 and a standard deviation of 3. These scores are then summed and converted to a quotient using a specific formula provided in the scoring manual. The TMQ has a mean of 100 and a standard deviation of 15‚ allowing for comparison to normative data. The calculation involves translating raw scores to developmental quotients (DQ) for each subtest‚ ensuring accuracy in reflecting an individual’s motor abilities. This systematic approach ensures the TMQ provides a reliable and comprehensive measure of motor development.

The Role of the PDMS-2 Scoring Manual in Clinical Practice

Interpretation of TMQ Scores

Interpreting Total Motor Quotient (TMQ) scores involves understanding their relationship to the normative data. The TMQ has a mean of 100 and a standard deviation of 15‚ allowing categorization of scores into levels such as Above Average‚ Average‚ Below Average‚ and Significantly Below Average. Scores above 115 indicate superior motor abilities‚ while those below 85 suggest difficulties. Scores between 86-114 fall within the average range. Interpretation should consider the individual’s developmental context and compare their performance to same-age peers. Clinicians use TMQ scores to identify strengths‚ weaknesses‚ and potential delays in motor development. This interpretation guides further assessment‚ intervention planning‚ and monitoring of progress over time‚ ensuring a comprehensive understanding of motor skills development. Accurate interpretation relies on proper scoring and adherence to the PDMS-2 guidelines.

instructions for hand and foot card game

Hand and Foot is a popular card game, blending elements of Rummy and Canasta, played with multiple decks. Teams aim to meld cards to eliminate their Hand and Foot piles first, promoting strategic thinking and social fun.

Overview of the Game

Hand and Foot is a popular card game that combines elements of Rummy and Canasta. Played with multiple decks, it involves strategy and teamwork, making it a social favorite. Players aim to meld cards to eliminate their Hand and Foot piles first. The game starts with players using their Hand pile, while the Foot pile remains face down until the Hand is depleted. With its dynamic gameplay and scoring system, Hand and Foot offers a fun and challenging experience for players of all skill levels, encouraging both competition and camaraderie.

Objective of the Game

The objective of Hand and Foot is to be the first player or team to eliminate all cards by forming valid melds. A meld consists of 3-7 cards of the same rank. Players start by using their Hand pile, then move to the Foot pile once the Hand is depleted. Teams earn points for completed melds, while unplayed cards in the Hand or Foot at the end of the round result in penalties. The goal is to accumulate the most points by efficiently melding cards and outperforming opponents.

Number of Players and Teams

Hand and Foot is typically played with 2–8 players, often in teams of 2 or 4. Teams work together to meld cards strategically.

Traditional Player Count

The traditional Hand and Foot card game is designed for 2 to 8 players, with the most common setup being 2 or 4 players. When played with 4 players, it is typically done in pairs, forming two teams. The game can also be enjoyed with larger groups, but the ideal number for strategic gameplay and balanced fun is usually between 4 and 6 players. This setup ensures active participation and teamwork, making the game dynamic and engaging for everyone involved.

Team Play Options

Hand and Foot can be played individually or in teams, with teams typically consisting of 2 players each. When played with 4 players, the game is often divided into two teams of two. This team-based format encourages coordination and strategy between partners. Larger groups can also form multiple teams, maintaining the core gameplay while adding a competitive edge. Team play enhances the social aspect of the game, as players must communicate effectively to win. This setup makes the game versatile for different group sizes while keeping it engaging and fun.

Deck Setup and Dealing

Hand and Foot uses two standard decks of 52 cards each, including jokers, totaling 108 cards. Each player receives two sets of 11 cards: one hand and one foot.

Number of Decks Used

Hand and Foot is played using two standard decks of 52 cards each, totaling 104 cards, plus four jokers, making 108 cards in total. This ensures a dynamic and lengthy gameplay experience. The doubled deck allows for more combinations and strategies, as players can work with multiple copies of the same card. The inclusion of jokers adds wild cards, enhancing the game’s complexity and fun. Using two decks is standard and essential for maintaining the game’s balance and preventing card shortages during melding.

Dealing Process

In Hand and Foot, each player receives two separate piles of 11 cards each: one for the “Hand” and one for the “Foot.” The dealer distributes the cards in a clockwise manner, starting with themselves. After dealing, players pick up their Hand pile first and their Foot pile second. The remaining cards are placed face down in the center of the table to form the draw pile, with the top card turned over to create the discard pile. This setup ensures the game begins promptly and fairly for all players.

Hand and Foot Piles

Each player receives two separate piles: the “Hand” for immediate play and the “Foot” to be used later in the game.

What is the Hand Pile

The Hand Pile consists of the cards initially dealt to a player, serving as their primary playing hand. It is the first set of cards used to form melds and books during the game. Unlike the Foot Pile, the Hand Pile is immediately accessible, allowing players to start playing right away. At the beginning of the game, each player picks up their Hand Pile to organize and plan their strategy. The Hand Pile is crucial for making the first melds, which are essential to unlock the Foot Pile later in the game. Managing the Hand Pile effectively is key to success.

What is the Foot Pile

The Foot Pile is a separate set of cards dealt to each player at the start of the game, placed face down. Unlike the Hand Pile, the Foot Pile remains untouched until the player has exhausted or played all cards in their Hand Pile. Once the Hand Pile is empty, the Foot Pile is picked up and used to continue playing. It serves as an extension of the Hand Pile, allowing players to form additional melds and books. The Foot Pile adds complexity and strategy to the game, as players must carefully manage both piles to maximize their scoring potential.

Melding and Books

Melding and books are fundamental to the game, involving sets or runs of cards. Players aim to create valid combinations to score points and complete rounds successfully.

Definition of a Meld

A meld is a set of three or four cards of the same rank, such as 3 Kings or 4 Aces. It is the basic unit of scoring in the game. A valid meld must consist of at least three cards, and wild cards (like Jokers or 2s) can be used to complete or enhance a meld. Melds are laid down on the table during gameplay, and players can build upon them by adding matching cards. The ability to create and strategically use melds is central to winning the game and earning points.

Creating Books

A book is a collection of seven cards of the same rank, such as seven Kings or seven Aces. To create a book, players start with a valid meld of three or four cards and add additional cards of the same rank during their turns. Wild cards can be used to complete a book, but only one wild card per book is allowed. Once a book is laid down, no other players can add to it. Completing books is crucial for scoring and winning the game, as it earns significant points and signals the end of the round.

Adding to Melds

Players can add cards to existing melds during their turn, either from their hand or foot pile. A card added must match the rank of the meld it is being added to. For example, a 5 can be added to a meld of 5s. Wild cards can also be added to melds, but only one wild card can be used per meld. Adding to melds is a strategic way to build toward completing books and earning points. Players can only add to their own melds or their team’s melds, not their opponents’.

Gameplay Rules

Players alternate turns, drawing cards and attempting to meld sets or runs. Each turn, a player must play a card, either by melding or discarding. Communication and strategy are key, especially in team play. Wild cards can be used to substitute for any card in a meld, enhancing flexibility. Proper card management and timing are crucial to success in the Hand and Foot card game.

Starting the Game

The game begins with each player receiving their Hand and Foot piles. The dealer shuffles the decks and distributes the cards evenly. The remaining cards form the draw pile. The player to the dealer’s left typically goes first. On their turn, a player draws a card and can choose to meld, add to existing melds, or discard. The first player to meld must meet the minimum melding requirement, which varies by variation but often starts at 50 points. Properly starting the game sets the foundation for strategic play and ensures smooth progression. Timing and initial melds are crucial for success.

Discard Pile Rules

The discard pile is central to gameplay, formed as players shed unwanted cards. Only one card can be discarded per turn, placed face-up on top of the pile. A player cannot discard if they have cards that can be added to their own or others’ melds. Wild cards (like jokers or twos) often have special discard rules. The discard pile is key for strategic decisions, as it reveals opponents’ potential moves and influences melding opportunities. Proper use of the discard pile can significantly impact a player’s chances of winning the game effectively.

Scoring System

Points are awarded for melds, with wild cards doubling their value. Unplayed cards in hand or foot piles incur penalties, affecting the final score significantly.

Points for Melds

Points for melds are calculated based on the cards laid down. Each numbered card is worth its face value, while face cards (Jack, Queen, King) and Aces are worth 10 points each. Wild cards, such as Jokers or twos, count as 20 points each when used in a meld. The total points for a meld are summed and added to the player’s or team’s score. Melds with wild cards are particularly valuable, as they significantly increase the points earned in a round. Strategically using wild cards can greatly enhance your score.

Penalties for Unplayed Cards

Penalties for unplayed cards are deducted from a player’s or team’s score at the end of the round. Any cards remaining in the hand pile at the end of play incur a penalty, with each card deducted at its point value. Additionally, all cards in the foot pile that were not played are also penalized. If a player has not laid down any melds by the end of the round, they receive an additional penalty. These penalties encourage players to strategically plan and play all their cards to maximize their score.

Winning the Game

Unplayed cards in hand and foot piles incur penalties at round’s end, deducted from the player’s score. Each card’s point value is subtracted, encouraging strategic play to minimize losses effectively.

End of Round Conditions

The round concludes when a player has successfully played all cards in both their Hand and Foot piles. At this point, all players calculate their scores based on the cards they’ve melded and any penalties for unplayed cards. The game typically continues for multiple rounds, with an overall winner determined once a predetermined total score, often 10,000 points, is reached by a player or team. The player with the highest cumulative score at the end is declared the winner.

Determining the Winner

The winner is decided after all rounds are completed, with the player or team having the highest total score declared victorious. Points are accumulated across rounds, combining meld scores and deducting penalties. The goal is to reach the highest possible score, with the winner being the one who surpasses a predetermined total, often 10,000 points. Each round’s score contributes to the overall tally, ensuring the final winner is the most skilled and strategic player or team throughout the game.

Strategies and Tips

Strategically manage your hand and foot piles, prioritize high-value cards, and plan ahead to create strong melds. Wise decisions maximize points and improve your chances of winning.

Effective Melding Strategies

Mastering melding is crucial in Hand and Foot. Focus on grouping cards into valid combinations, prioritizing high-value cards to maximize points. Plan ahead by organizing your hand and foot piles to form strong melds efficiently. Communicate with teammates to coordinate melds and avoid duplication. Pay attention to the discard pile to identify potential additions to your melds. Strategically hold onto key cards to complete sets or runs, while balancing the need to discard unwanted cards. Effective melding requires foresight and adaptability to outmaneuver opponents and secure victory.

Managing Your Hand and Foot

Efficiently managing your hand and foot piles is essential for success. Always prioritize organizing your cards by rank and suit to identify potential melds quickly. Use your foot pile strategically, reserving it for cards that don’t immediately fit into your hand melds. Regularly shuffle and reorganize your piles to maintain clarity. Balance holding onto useful cards with discarding unnecessary ones to avoid penalties. Keep track of the cards played to anticipate future moves and adapt your strategy accordingly. Proper management enhances your ability to meld efficiently and outplay your opponents.

Common Variations and House Rules

Players often introduce custom rules, such as using jokers as wild cards, adding bonus points for specific melds, or allowing card trading between hands and foot.

Alternate Rules Options

Some players modify the game by introducing wild cards, such as jokers, to add strategy. Others allow trading cards between the hand and foot piles. Certain groups set a minimum meld requirement or award bonus points for specific card combinations. Additionally, some variations include penalties for unused cards or unique scoring systems. These alternate rules can enhance gameplay and cater to different player preferences. They provide flexibility for customization, making the game more dynamic and enjoyable for diverse groups.

Customizing the Game

Players can tailor Hand and Foot to suit their preferences by adjusting rules or adding house rules. For instance, the number of decks or the scoring system can be altered. Some groups allow additional wild cards or modify how melds are formed. House rules, such as special penalties or bonuses for specific card combinations, can also be introduced. This customization ensures the game remains engaging and adaptable for different player preferences and skill levels, making it a versatile option for card game enthusiasts.

Hand and Foot is a dynamic and engaging card game that offers a perfect blend of strategy and social interaction. Its unique rules and customizable options make it appealing to players of all skill levels. Whether played casually with friends or competitively in tournaments, the game provides endless entertainment. By mastering melding techniques and adapting to house rules, players can enhance their enjoyment and improve their chances of winning. Hand and Foot remains a beloved choice for card game enthusiasts seeking both challenge and camaraderie.